The Schema App WordPress Plugin automatically generates markup for Posts and Pages. Custom Posts created within WordPress can also receive markup. To enable markup on Custom Posts, you will need to install the Schema App WordPress Advanced Plugin and configure some settings. This support article details how to configure those settings correctly.
Resources Required
- WordPress CMS
- Schema App WordPress Plugin
- Schema App WordPress Advanced Plugin
- Optional: Advanced Custom Fields
Instructions
Step 1: Navigate to Schema App WordPress Plugin settings
From within WordPress admin, select Settings > Schema App.

Step 2: Navigate to the Custom Posts tab within the settings
Under the "Custom Posts" tab, you'll find a list of all the Custom Post Types associated with your website. Find the Custom Post Type you want the plugin to support.
Step 3: Assign a Schema.org Type to the Custom Post Type
Choose the most accurate and specific Schema.org type for the content. You can review the full Schema.org hierarchy here. In this example, the content in the "post_resources" Custom Post Type is best described as an Article (https://schema.org/Article).
Note: you should only include the Type, not the entire URL. For example, if you want to describe a page as a Video Gallery, you would use VideoGallery (no spaces) instead of https://schema.org/VideoGallery
Note: You should only use a Type, and not a property. Setting this value to a property will result in errors in the Schema Markup Validator.

Once the Custom Post Type is mapped, markup can reach those pages two ways:
- Plugin-generated markup: the plugin builds the markup from the type you assigned. The optional steps below extend it by mapping custom fields to Schema.org properties.
- Editor or Highlighter markup: any markup you author for a page in the Schema App Editor or Highlighter replaces the plugin-generated markup for that page.
Optional Step 4: Navigate to Custom Fields > Field Groups
Look for the Custom Fields plugin if you have it installed. Navigate to the Field Groups Editor.

Optional Step 5: Assign the relevant Schema.org property to relevant fields
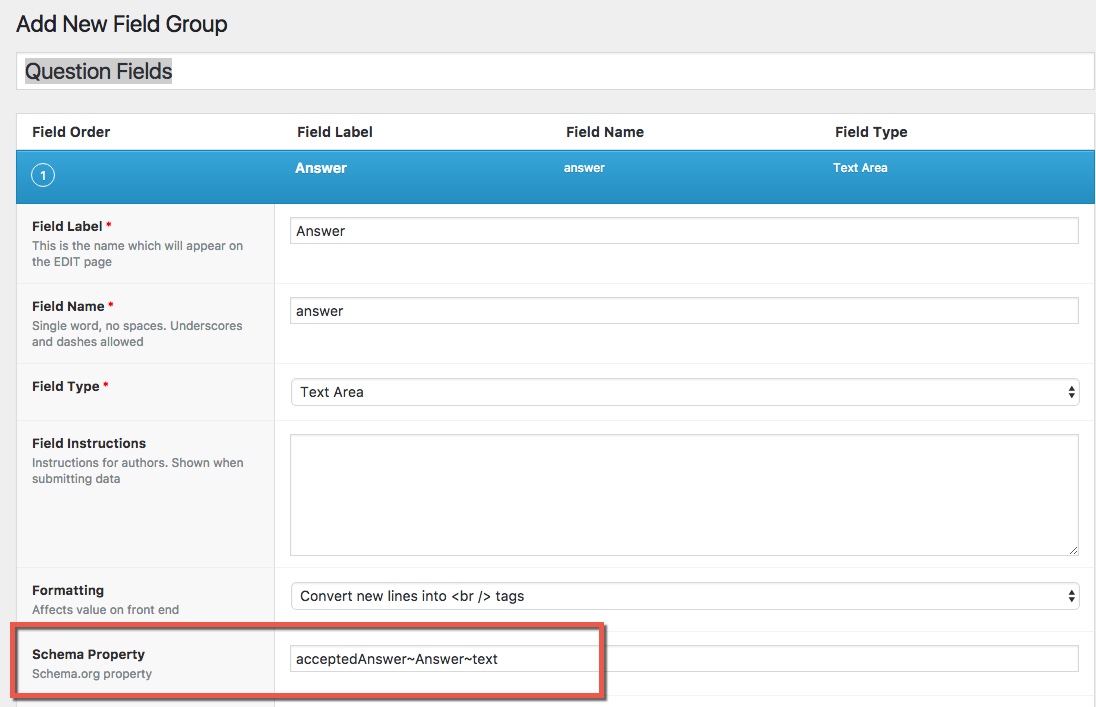
For a given field, you can assign a relevant Schema.org property or property path. A property path is when a relationship is described using a chain of Types and properties. In a property path, Types and properties are separated by a tilde (~) and no spaces.
Attention: Schema.org Types and properties have specific naming conventions. Types use PascalCase, while properties use camelCase.
Note: The properties and property paths you use will depend on the content of the Article. The example below shows a property path for acceptedAnswer~Answer~text that maps to the Answer content area. In steps 1-3 this Custom Post Type was likely described as an FAQPage.
Was this article helpful?
That’s Great!
Thank you for your feedback
Sorry! We couldn't be helpful
Thank you for your feedback
Feedback sent
We appreciate your effort and will try to fix the article