How to Set Up the Schema App Custom Connector in ChatGPT
This guide is intended for ChatGPT Admins who can create custom connectors for their organization. It explains how to set up the Schema App connector so your team can query Schema App project data items directly within ChatGPT.
Step 1: Enable the Schema App Connector
Select your name in lower left, to Open Settings
Select the Apps & Connectors menu item on the left.
Scroll down to Browse connectors to find Schema App the list.

Step 2: Connect Schema App
Locate the Schema App connector in your list.
Click the Connect button (Chat GPT may redirect you on your behalf.
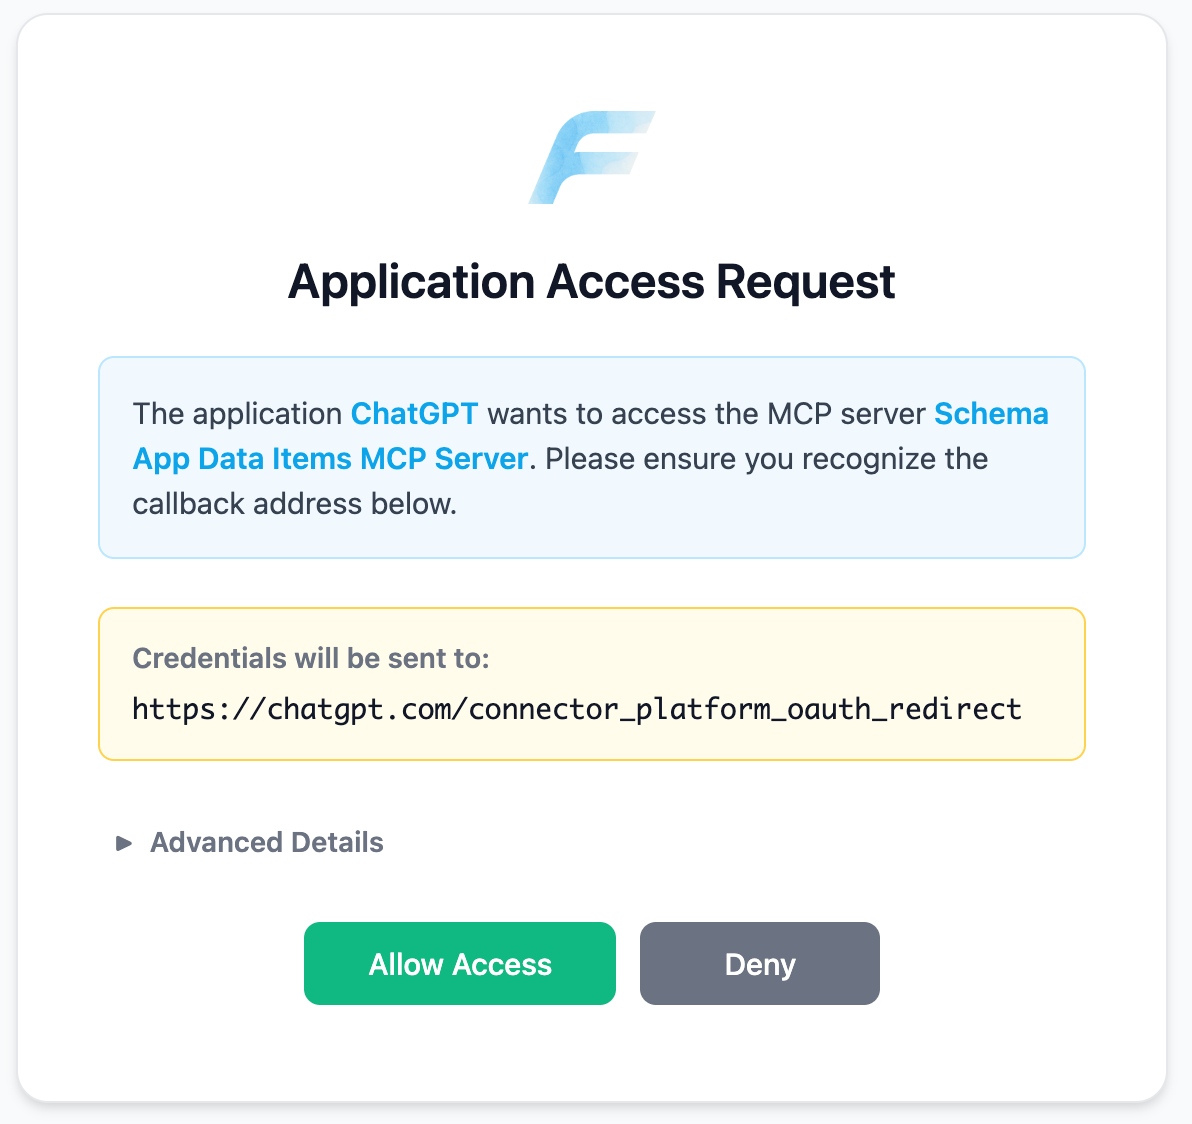
Select Allow Access in the OAuth connection screen


Step 3: Authenticate with Schema App
You will be redirected to the Schema App login page.
Enter your Schema App email address and password.
Click Sign In.

Step 4: Complete the Connection
After logging in, you’ll be redirected back to ChatGPT.
The Schema App connector will now appear under Enabled connectors.

Step 5: Use Schema App in ChatGPT
Once connected, you can:
Access Schema App by selecting it in the chat prompt alongside other connectors.
Query your Schema App project data items directly within ChatGPT.

Your Schema App Custom Connector is now ready to use inside ChatGPT.
Was this article helpful?
That’s Great!
Thank you for your feedback
Sorry! We couldn't be helpful
Thank you for your feedback
Feedback sent
We appreciate your effort and will try to fix the article